Showing posts with label inspiration. Show all posts

Saturday, September 21, 2013

Pillow overhaul.

It feels good to finally get my sewing machine out for the first time in months! Now that I finally have a little desk to use as my sewing area, I can get some projects done!

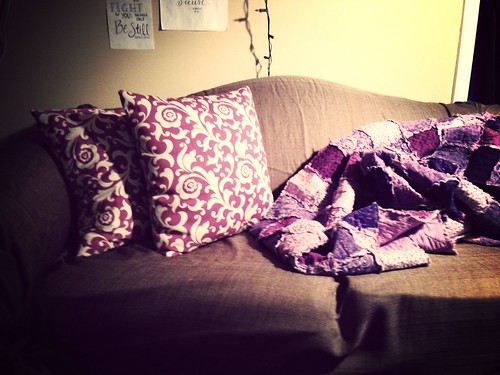
I just recently bought a little loveseat at the neighborhood wide yard sale a couple weeks back and covered it with a cute slipcover from target (i literally go to Target like every single day that I don't have to work... )But I like to keep my purple quilt on my couch and the throw pillows I had been using were plain old brown ones from my room way back in probably middle school. Sooo... time for an overhaul. My need to sew + no really good fabric stores in town + my newfound love of online shopping = fabric.com

I got two yards of this print for less than $30 including shipping. I definitely used less than a yard for this project, so I'd say it cost me less than $15. Cheap=awesome.

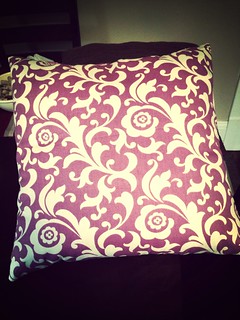
This is not really a very involved project, so I won't go into a lot of detail. But I'm proud of how these pillows turned out:

Pillow upgrade


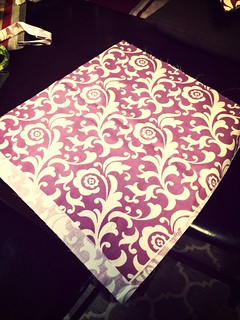
My pillows were 17 1/2 by 17 1/2 inches, so I cut squares of fabric that were 18x18 to allow for a 1/4 seam:

Pillow upgrade


Pillow upgrade


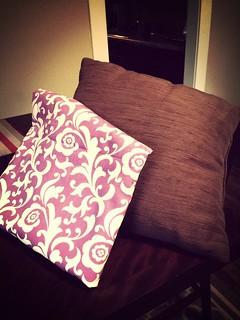
This is super easy. Just sew the squares together inside out, leaving enough space along one edge (about the middle third) to squeeze the pillow inside. Flip the case right-side out, insert pillow and pin and hand-stitch (or machine stitch) the opening. I don't mind hand-stitching them when I have plenty of time to sit around and watch a couple episodes on Netflix like I did today.

Pillow upgrade


Pillow upgrade


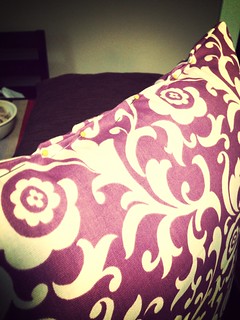
Ta da! Cheap, easy, adorable AND I never even had to leave the house. That's my kind of project.

Monday, March 11, 2013

Do-it-yourself adorable chair!

Okay, so more like "do-it-yourself with the help of your little sister and odd looks from neighbors," but hey, this was a fun project... and it turned out adorable! Now I actually want to practice my cello just so I can use my newly beautified chair!

redone chair!
I first saw this project on Pinterest (ahhh, so addicting!), and I immediately thought of my nasty old fold-up chair that I sit on to play my cello. Unfortunately I didn't take a before picture, but I'm sure you can imagine the former ugliness!

Easy project -- all you need is some spray paint and about 1/2 of a yard of fabic. Crazy or classy! Although I have to admit, my old-man veteran neighbor thought I was crazy for "wasting paint on a chair." He had to come over and look at the spectacle up close (I spray painted it in my front yard)! He then proceeded to talk non-stop to Dani and I for about 30 minutes. (He's a talker... it's okay though -- he's hilarious and has good stories!)

chair/cello

So, the project instructions that I saw on Pinterest involve actually removing the seat cushion and re-covering it. However, this was impossible with my chair, so Dani and I resorted to shoving the fabric through with a butter knife. Yes, butter knives can be used for more than just butter! So if you don't want to completely remove the seat/cushion, try this technique AFTER spray painting the frame of the chair.

This project was very easy & cheap!! About $3 for a can of spray paint and $3 or $4 for the fabric... and it's SO cute! Now I have a cute "cello corner" in my room instead of that nasty old chair!!

-Jenny :)

Monday, February 25, 2013

Lace Love

I love lace and I love my new bag!

photo-7

For Valentines day, our mom made each of us girls the sweetest bags! She had seen me eying all the pretty laces at the craft store and went back and bought them to sew on a little tote bag! I was so surprised and just adore how cute it turned out!

editIMG_1282


editIMG_1286


editIMG_1287


-Dani

Friday, February 22, 2013

Craft Break

Over my long Christmas break I finally had time to try some of the craft ideas I had been thinking of. Plus, my room needed some sprucing up since it had become a dumping zone for school supplies and projects.

I had some canvases sitting around for a while but I had been too scared to commit to painting something on them to end up changing my mind. Finally I just did it. I decided to put on a phrase on one of them and it was super easy to do. All you need is your canvas, paint, paint brushes, and letter stickers. I just painted the whole canvas the color I wanted the letters to be, stuck on the stickers, painted the whole canvas in another color as a "wash", then took the stickers off.

IMG_1249

IMG_1243

I had been wanting a little chalk board where I could easily change out verses. I found an unfinished wood frame, sanded it a little, then painted the frame white and the inside part with chalkboard paint.

IMG_1244
One day when I was bored and in a crafty mood, I made some chiffon flowers. Then I found some twigs outside and attached the flowers to them and put them in a bottle.

IMG_1245

It's funny how some simple little projects can revive a room!

-Dani

Thursday, February 21, 2013

Lake Michigan Winter

A couple weeks ago Matt (the little brother) and I took an excursion to Lake Michigan. Or should I say on? We were walking out to the water when all the sudden we realized that we were way farther out than the shore usually is. We were on ice! We probably should have turned back right away but we just had to get some pictures first!

IMG_1013
Dani lake mi
IMG_0984
IMG_1003

The lake was like a giant slushie with rolling waves. It was so crazy but even more beautiful! I promise we didn't go as close to the edge as it looks! But I'm very thankful we didn't fall through the icebergs!

-Dani

Saturday, August 18, 2012

Fabric Flower Necklace

Confession: I have been making lots of flowers lately (there will be more on that later). Until now they have all been to put in hair. So I decided to try something different. A fabric flower necklace! I used a easier way (I call it cheating) to make the flowers for my necklace than the way I usually make flowers. I used this tutorial as a reference. I was lucky enough to find all the materials right in my house and the fabric I used is actually one of my dad's old shirts!

fabric flower necklace

What a great way to dress up a simple shirt! I added a pearl in the center of each of my flowers for a little extra something. Also, my flowers are slightly larger than that of the tutorial and I did not make the chain as long. Overall, this was a very easy, non-stressful project to do and took me less than an hour!

-Dani

Friday, August 17, 2012

Tennessee crafts

So, here's the thing. I finally gave in and got a Pinterest. BUT I'm actually surprised at how much it's inspired me. Instead of just sitting there and surfing the internet more, I have all this motivation and some fantastic ideas for things to do on my days off from the hospital.

Yesterday I decided to take a trip to the craft store, which turned out to be a disappointment. (I miss my Hobby Lobby and JoAnn's!) But I picked up a few things and sat around in the sun with my puppy doing projects all afternoon, which was great.

First up, I bought a cute picture frame on clearance for just $2. I put a cute patterned paper in it and now we can just write on the glass with an expo marker... it's perfect for writing verses or quotes or just little messages! I also bought some of those cinnamon-scented pine cones and just put them in a little bowl with some scrap fabric. This apartment still smells pretty strongly like cigarette smoke and I've literally been doing everything I can think of to both cover up the smell and get it out of here. If you have any thoughts on that, PLEASE let me know. So gross. But the pine cones remind me of Michigan, so I love them. And I had a few leftover to put in the bathroom too.

DSCN1858

DSCN1857


Here's what I have on top of the bookshelf. I LOVE the candle in a mason jar (from Amber's wedding I think!) Then of course we have a picture of the family and I got some flowers to brighten up the room.
DSCN1860

And here's the whole shelf:
DSCN1861


I also decided to recover my lampshade since it was boring old white and looking pretty grosss. I bought a little piece of tan colored fabric and recovered it, then put a dark purple velvety ribbon around the edges. I also bought some flowers to put in a little vase in my room, so I pulled off a couple of those and glued them on the lampshade as well. Then (Pinterest idea!) I used a sharpie paint marker/pen to write verses on it. It's not perfect, but I think that's why I love it so much. Now I just have to recover the bottom of the lamp to match it.
DSCN1862

There should be more to come soon :) Or maybe some pictures of these gorgeous East Tennessee mountains I've been enjoying.

Monday, June 4, 2012

Summer is Upon Us

summercollage

There shall be eternal summer in the grateful heart. -Celia Thaxter


Summer is the best in my opinion. It's worth the long, bitter winters we have to put up with. Summer truly is a gift from God that I'm so grateful for every time it comes around. I came up with the idea to paint this sunny little collage as I was thinking about all the things I want to do this summer. I want to squeeze every last drop out of this sweet summer that I'm given the chance to enjoy.


-Dani

Sunday, June 3, 2012

Psalm 18:30-36

DSCN0569

Photo: Jenny Rose (Greeneville, TN)

As for God, his way is perfect;
The word of the LORD is flawless.
He is a shield
For all who take refuge in him.
For who is God besides the LORD?
And who is the Rock except our God?
It is God who arms me with strength
And makes my way perfect.
He makes my feet like the feet of a deer;
He enables me to stand on the heights.
He trains my hands for battle;
My arms can bend a bow of bronze.
You give me your shield of victory,
And your right hand sustains me;
You stoop down to make me great.
You broaden your path beneath me,
So that my ankles do not turn.


-- Jenny